-e1742971339568.png)
 Liam
July 29, 2025
Liam
July 29, 2025
When I decided to embark on a new adventure focused on photography, I wanted more than just snapshots – I wanted to capture moments, stories, and emotions. That’s when I heard about this amazing photography tour that promised access to the city’s most breathtaking tourist photography spots. Honestly, the promise of a 300-cent guided tour paired with a free photography course sounded like the perfect combo to elevate my skills and experience the city through a fresh lens. Plus, after so many trips where I ended up with the same tired photos, I was eager to learn travel photo tips to make my travel memories truly stand out.
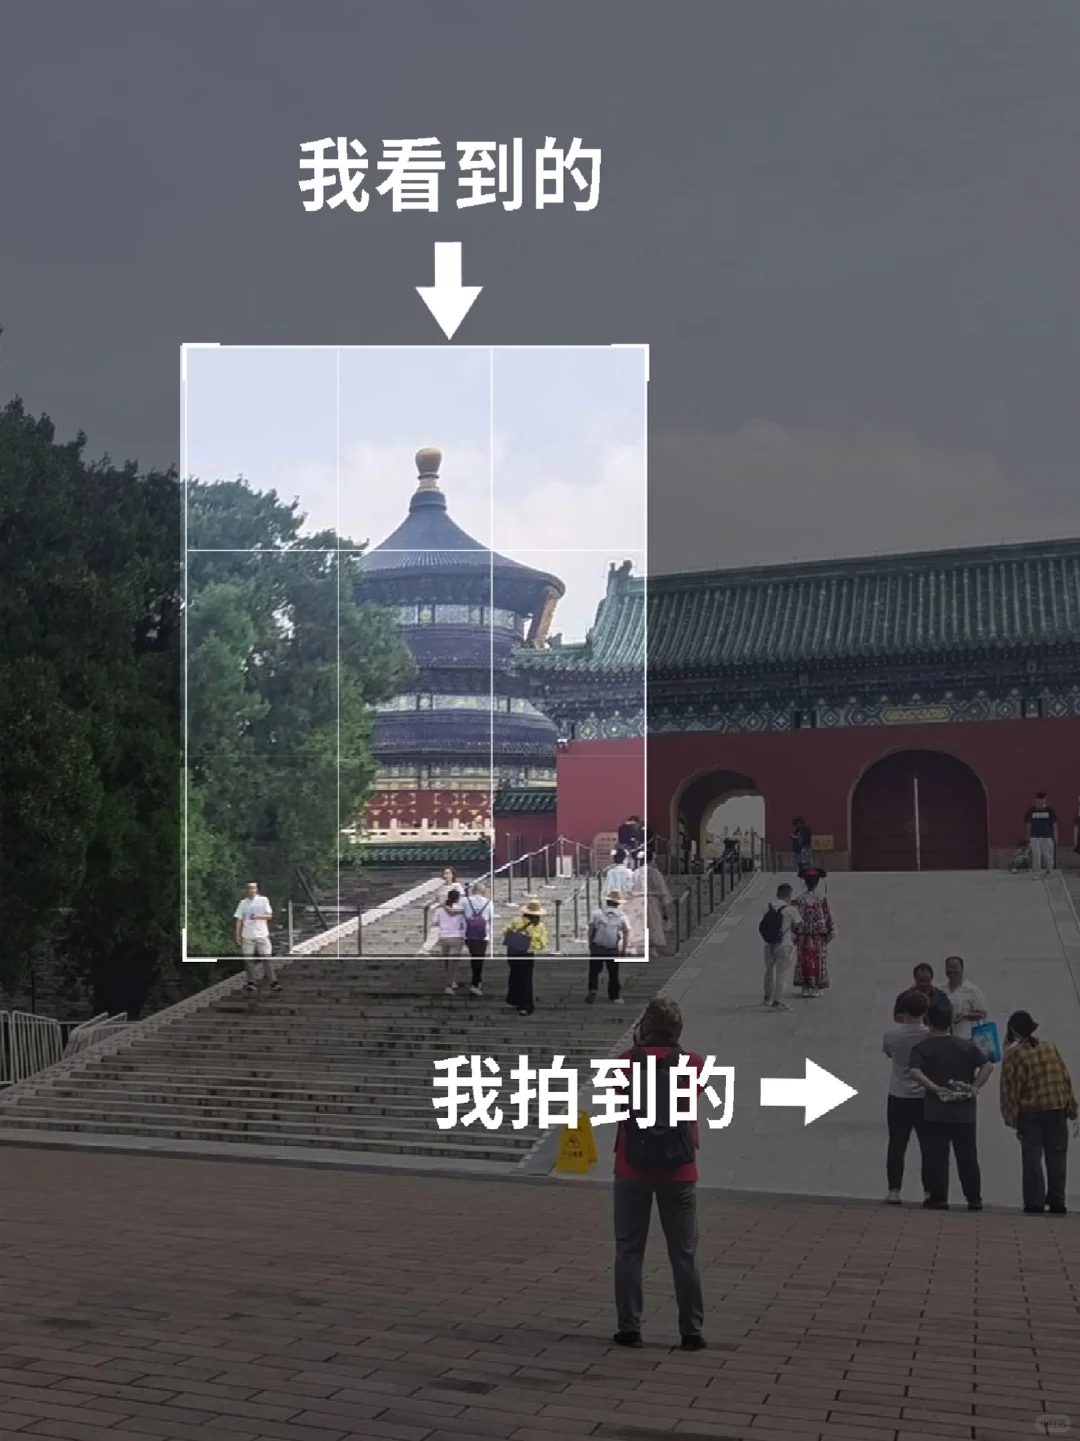
Our starting point was a bustling square where the city’s modern skyscrapers towered above us. I remember feeling an immediate buzz – these iconic buildings weren’t just impressive structures; they were alive with stories waiting to be told through my camera lens. The guide encouraged everyone to relax, and one of the group’s favorite lines was, “Let’s do a big pyq shoot.” It was humorously refreshing and set the tone for a day filled with exploration and creativity.
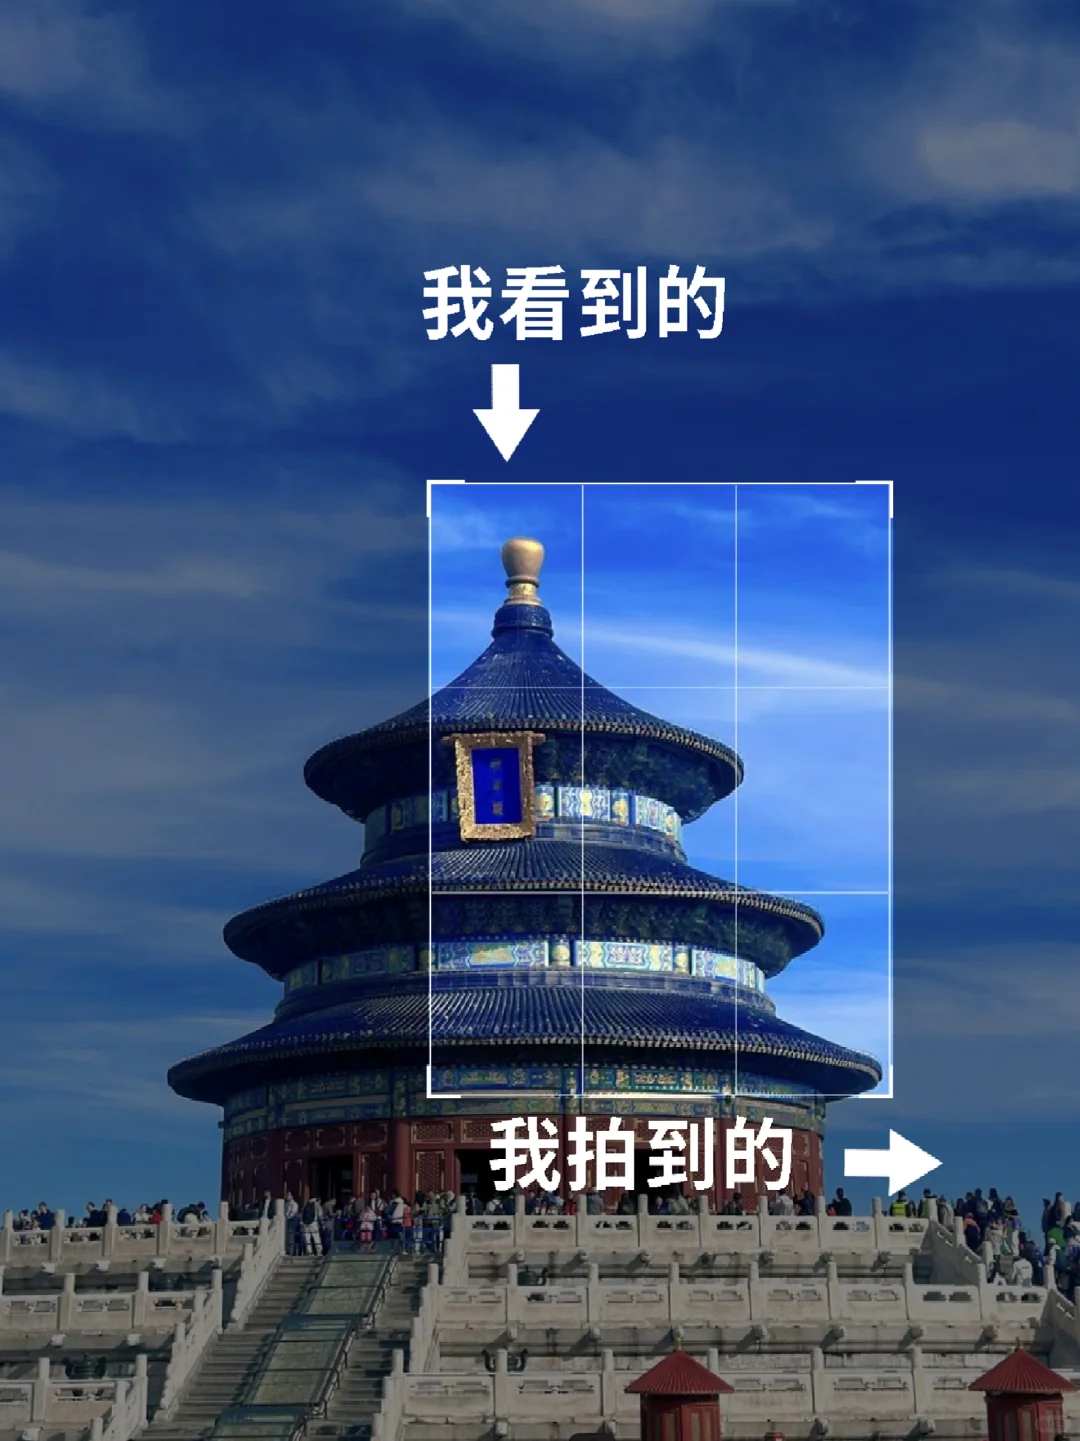
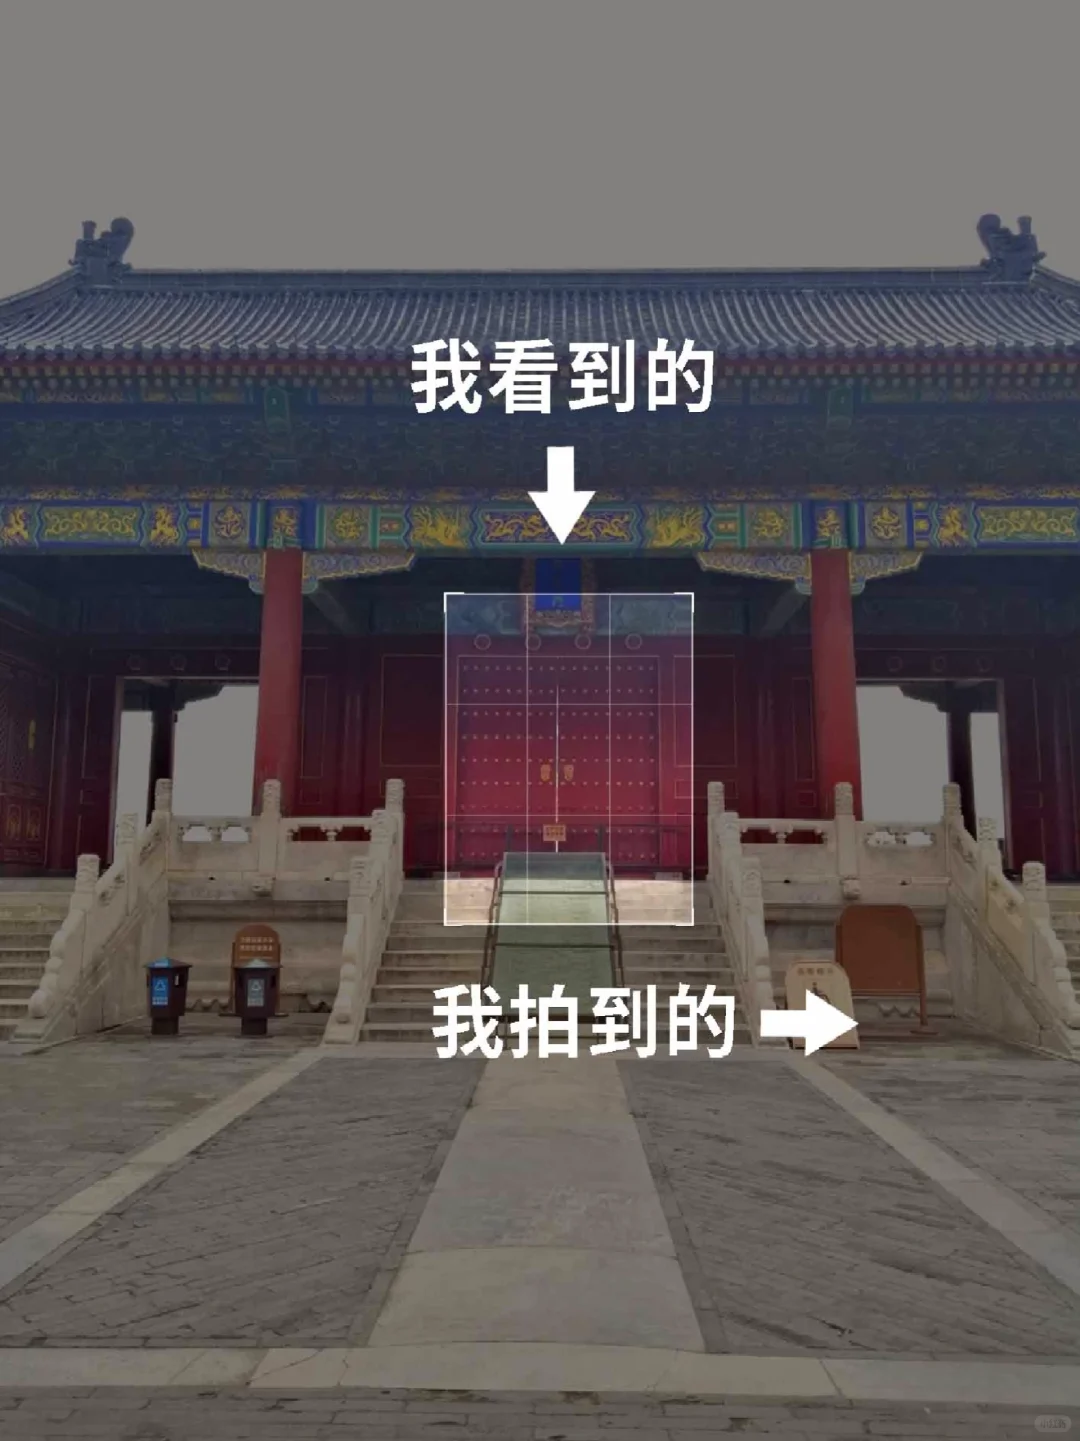
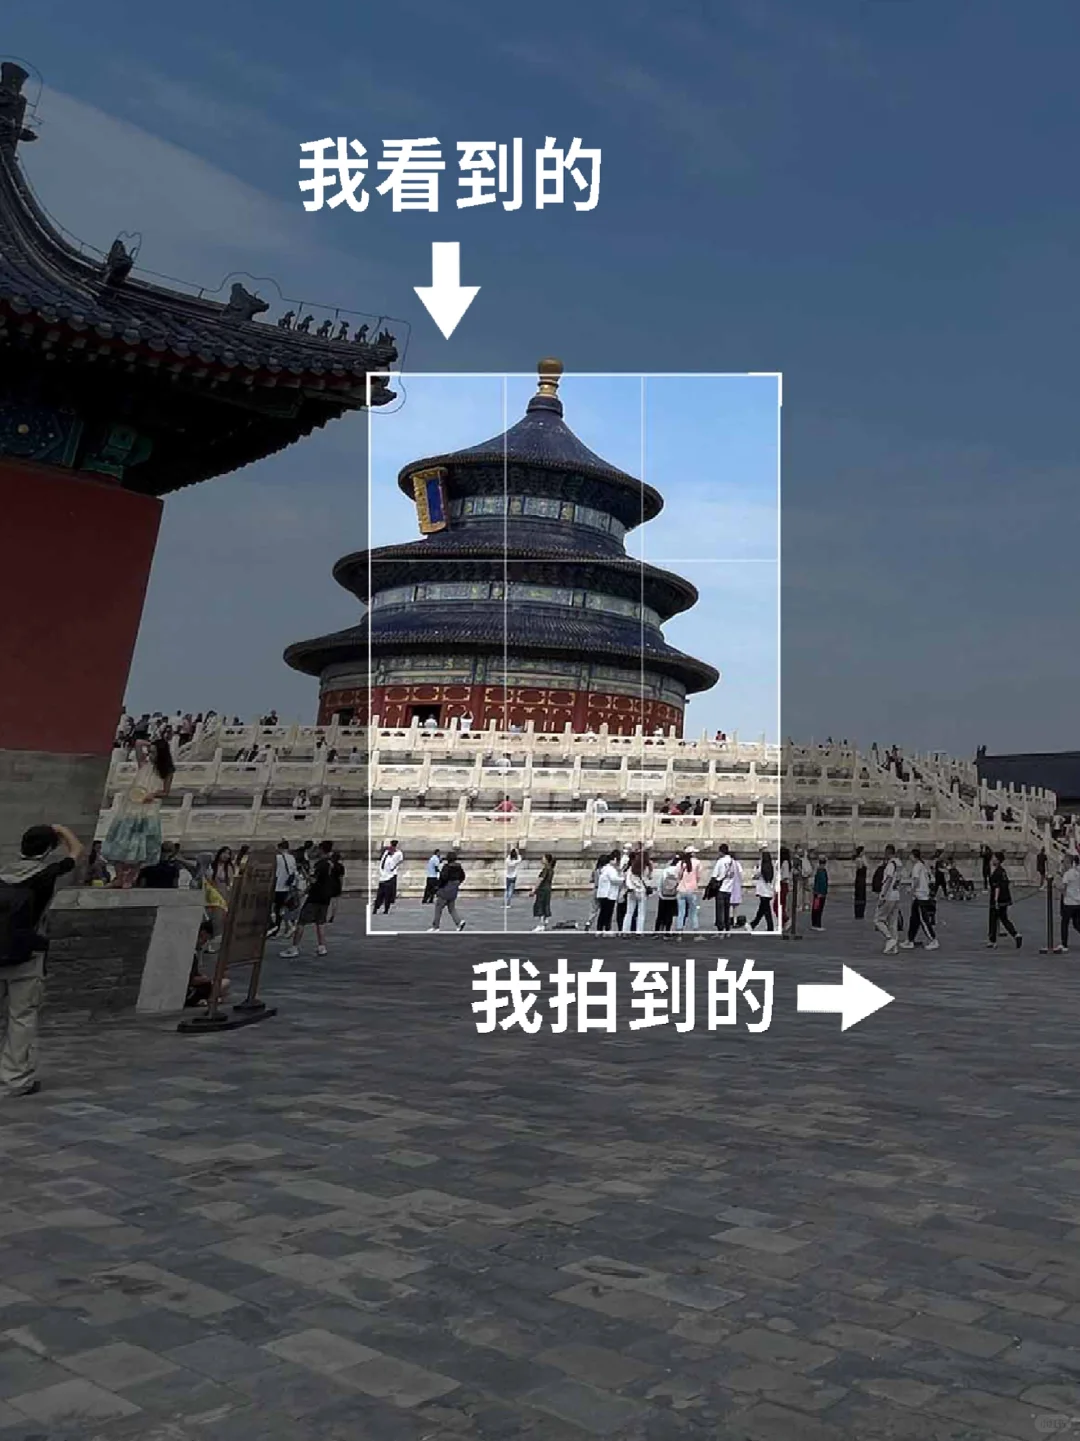
To make the most of the morning, I focused on identifying ideal skyscraper photo spots that offered diverse angles and captivating light. From ground level dramatic shadows to rooftop vantage points, every setting promised unique opportunities for memorable frames.
Check out this guide for more city photography spots
Walking through the busy streets under glass and steel giants, I found myself quickly immersed in the art of perspective. The guide reminded me to avoid “shooting stupid tourists again,” which was his funny way of saying to be mindful of framing and timing. Instead, the focus was to notice how reflections changed throughout the morning light and how the glass facades created dynamic visual stories. This was my first real taste of how selective composition can transform a scene that initially felt overwhelming.
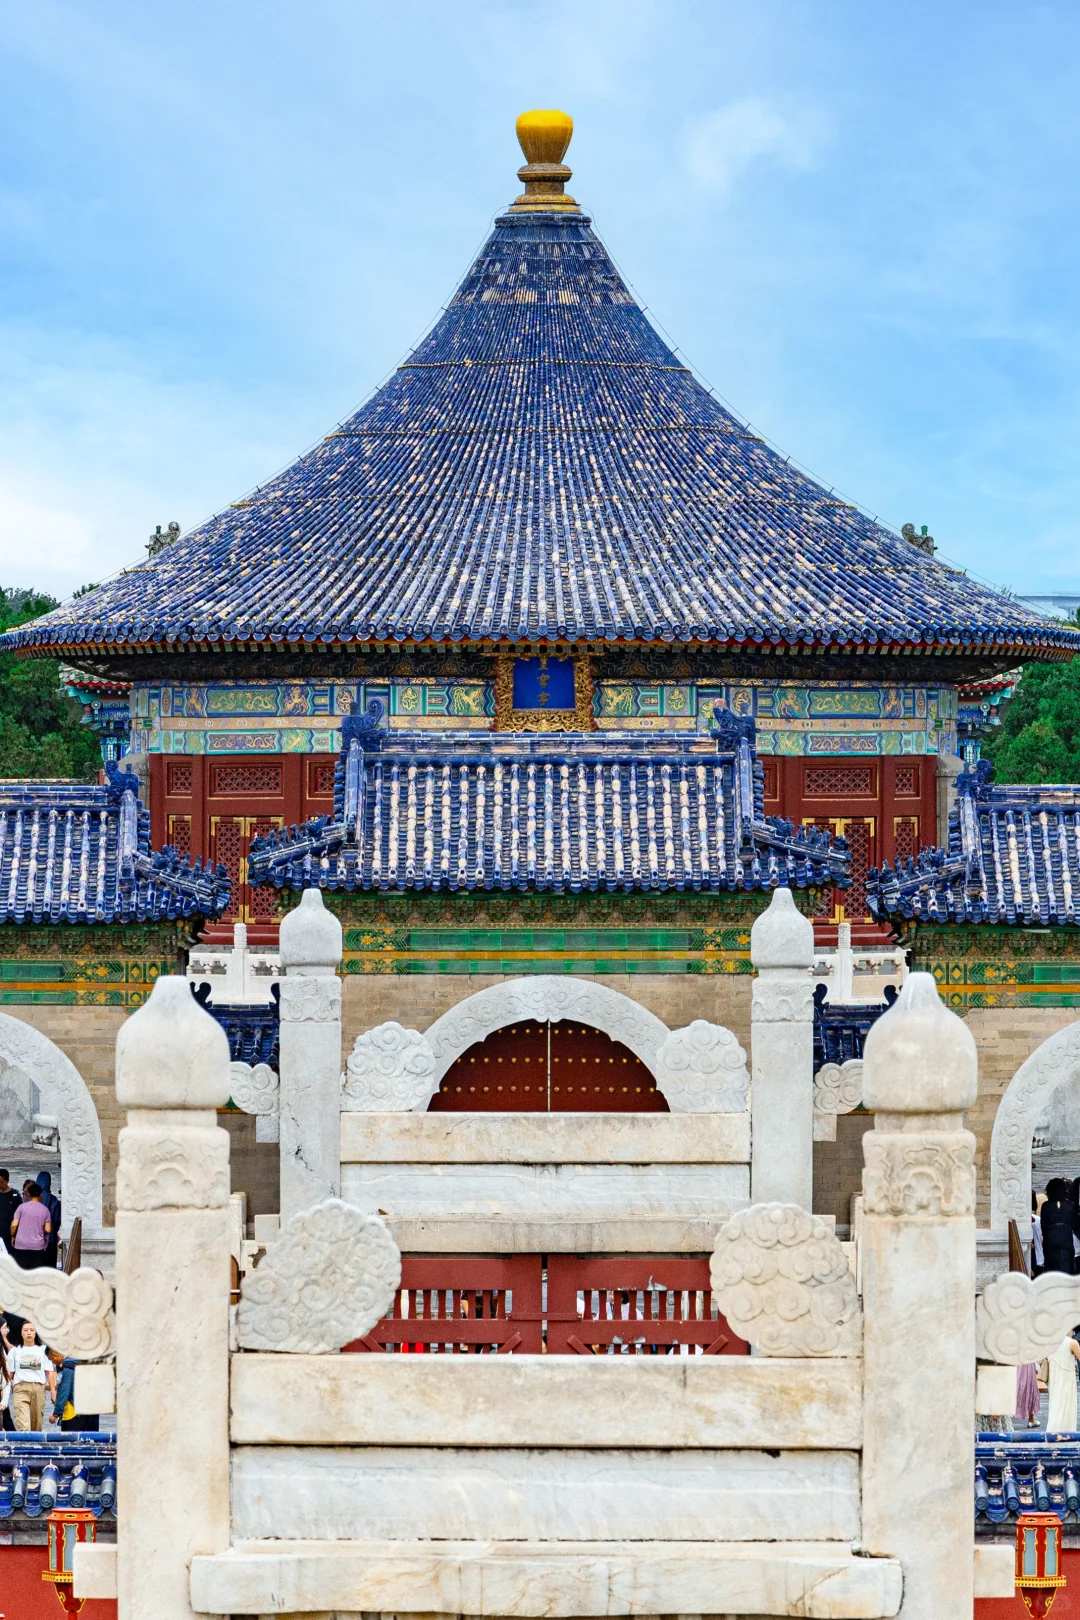
The best part about these skyscraper photo spots was their diversity. One moment, I was standing between towering steel structures feeling like a speck in the metropolis. The next, I was crouched on a stairwell capturing the upward view framed perfectly by intersecting lines. I felt like a kid again discovering new ways to play with light and shadow.
One highlight was spotting a rooftop overlooking a cluster of tall buildings. From here, the interplay of sunlight and shadow created bold geometric shapes, perfect for minimalist photos. This refresher on perspective and lighting truly boosted my confidence.
Learn rooftop photography techniques here
Midway through the day, right after my morning explorations, I joined a free photography course offered by the tour organizers. The course was a gem for any photography traveler like me who’s eager to step up their game without shelling out a fortune.
Our instructor emphasized the importance of understanding light conditions and mastering camera settings to capture the moment with authenticity. “Don’t just shoot what you see; shoot what you feel,” was a phrase that stuck with me. The group was encouraged to experiment with aperture, shutter speed, and ISO in real-time. This hands-on approach reminded me of the advice shared by the Smithsonian Institution’s education resources about experiential learning in visual arts.
What I found especially useful was the quick breakdown of how to use natural light effectively and tips on approaching subjects for candid shots without disturbing the flow of their day. This awakened a new level of appreciation for street photography, which often forms the heart of any effective tour-based photography experience.
See more useful photography courses here
By afternoon, we moved out of the glass and steel into crowded streets lined with stalls, vendors, and locals going about their day. This part of the day was all about embracing the unpredictability of a photography tour that mixes cityscapes with street life.
I must admit, I’d been nervous about managing so many moving elements – people, lighting, colors – but the tips from the morning’s course kept popping up in my mind. Sometimes I’d pause and remind myself to “find a space for ants,” which meant looking for small but detailed scenes and close-ups of faces or hands engaged in everyday tasks.
We even had the chance to join a photo walk with a few local photographers who shared insights on capturing emotions and fleeting moments. I learned how patience and a bit of humility go a long way when asking permission to photograph strangers or working with natural light in shaded alleyways. It was humbling and inspiring at the same time.
Master street photography with these tips
Let me share some of the best travel photo tips I picked up during this vibrant day:
These tips, along with the structured guidance from the free photography course, gave me a foundation that felt solid and accessible. It was also comforting to know that I didn’t need fancy equipment to start improving my photography on travels.
Discover recommended travel photography gear here
Looking back on this incredible day, I now understand why so many travelers seek out curated photography tours for their trips. Beyond the stunning frames of skyscrapers or lively streets, these tours provide a lens of connection – to the city, its people, and to myself as a storyteller behind the camera.
Finding the best tourist photography spots was definitely a highlight, yet the lessons from the free photography course and hands-on experiences truly enriched my approach. Whether aiming for lofty cityscapes or intimate street portraits, I feel far more equipped with useful travel photo tips than ever before.
If you’re curious about where to start on your own journey, I encourage exploring local tours combined with workshops or courses, like I did here. The balance of guidance and freedom provides endless inspiration, all while making new friends and connections along the way.
Get inspired for your travel photography here